

About
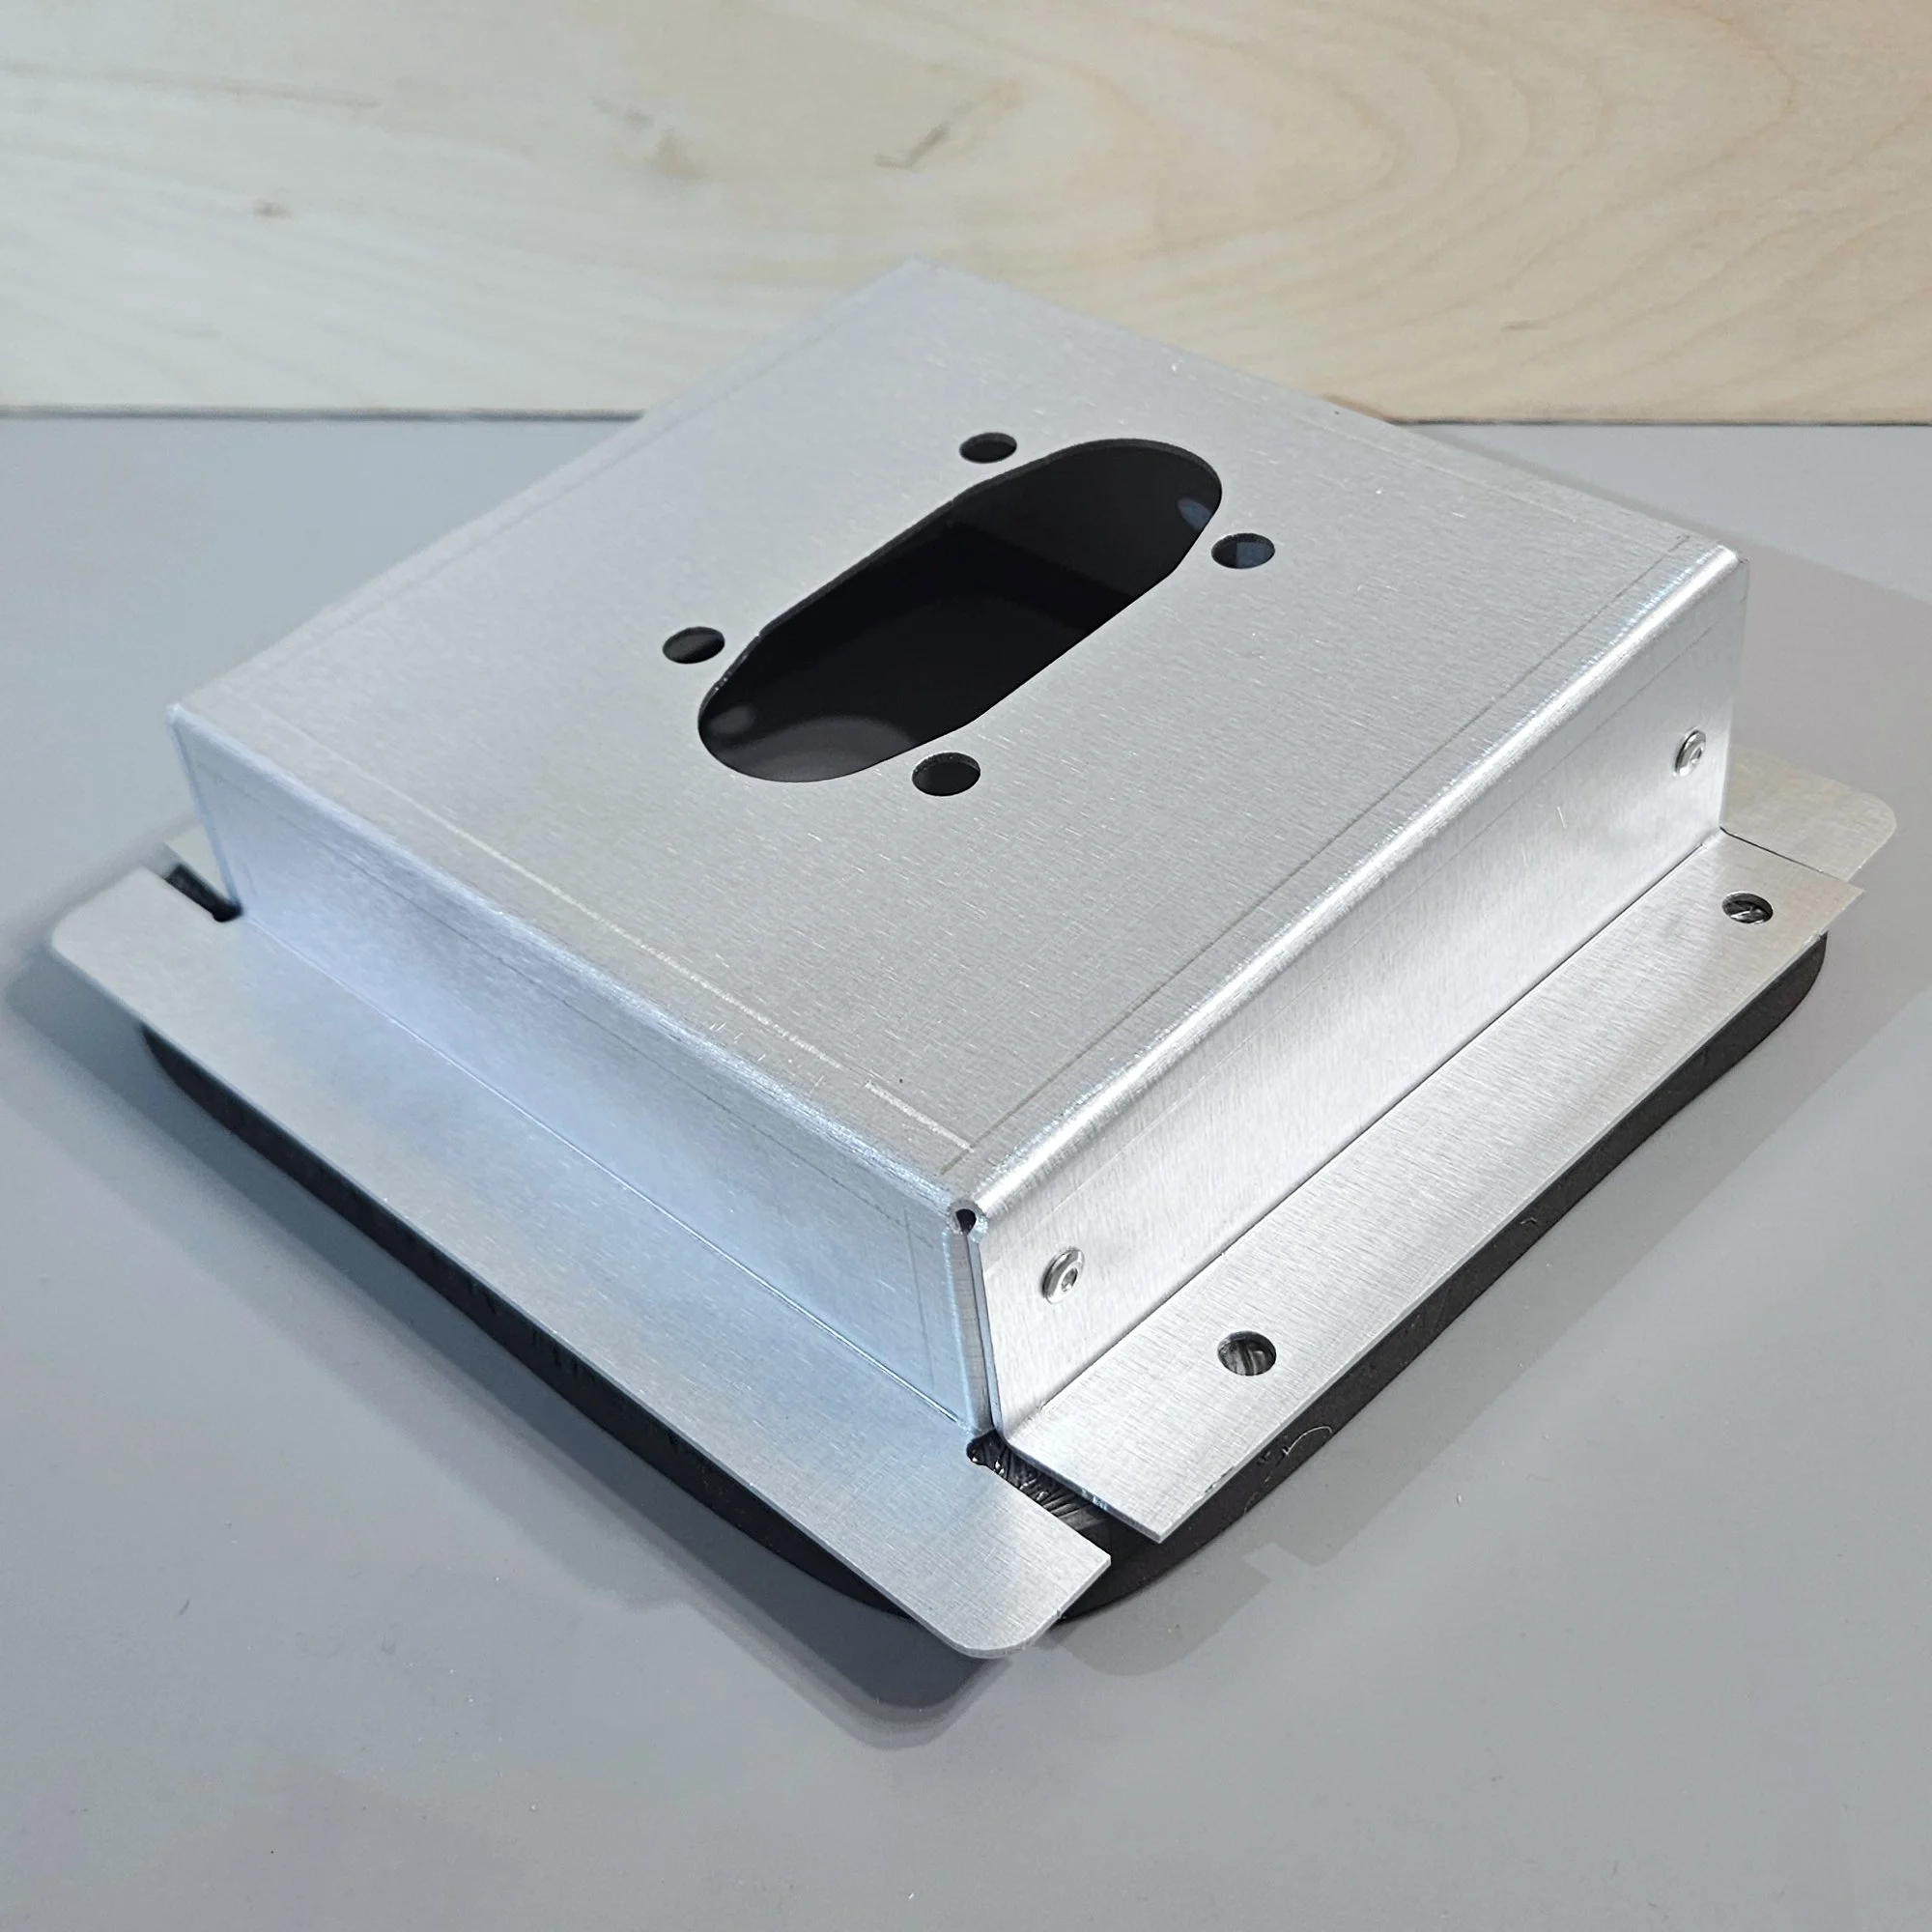
The elevated design replaces the factory-style flat mounting position and creates the clearance needed for the heater to sit over the seat base. This guide focuses specifically on installing and using the TrailBlaze mounting plate. For heater-specific fuel connections, wiring, exhaust components, and operating requirements, always follow the instructions provided with your heater.
What’s Included
The current TrailBlaze mounting kit includes:
TrailBlaze heater mounting plate
Pre-attached mounting/sealing ring with neoprene on the underside
No mounting hardware, fuel fittings, zip ties, or other heater installation components are included in the current kit.
Most compatible heaters come with their own mounting plate and fasteners. The fasteners supplied with the heater can generally be used to attach the heater to the TrailBlaze mounting plate.
Tools and Materials
You will need tools and materials appropriate for your van and heater installation. At a minimum, plan on having:
T40 Torx bit for removing the factory seat
Drill or driver
4.5–5" hole saw
Tape measure
Tool for cutting the floor mat
Appropriate sealant
Tools and hardware required by your heater manufacturer
A smaller hole can work, but a 4.5–5" opening provides more room to position and separate the heater's exhaust, intake, and fuel line during installation.
1. Remove the Passenger Seat
Remove the passenger seat according to the vehicle manufacturer's procedures.
On the ProMaster shown in our installation video, the seat is secured with six factory bolts. A T40 Torx bit is used to remove them. There are also electrical connectors beneath the seat for systems such as the airbag and seat-belt signals.
Disconnect the necessary connectors before removing the seat and set the seat aside.
Important: Vehicle configurations can vary. Take care not to damage or pull on the factory wiring beneath the seat.
2. Mark and Cut the Floor Mat
With the passenger seat removed, locate the factory slot where the tire kit mounting hardware is positioned.
Use the back of this slot as your reference point. Measure approximately 9 inches forward and mark the cut line across the floor mat.
It is better to start with a smaller opening and enlarge it as needed than to cut too much material away.
Be especially careful of the factory wiring beneath the floor mat. Do not cut into or damage the vehicle's wiring.
3. Cut the Heater Opening
The TrailBlaze plate is designed around an opening that gives the heater components enough room to pass through the floor while still allowing you to position them where they need to go.
A 4.5–5" hole saw is preferred.
The larger opening provides additional flexibility when routing the heater's exhaust, intake, and fuel line and makes it easier to keep those components separated.
A smaller opening may work, but it gives you less room to move and position the components.
If your van already has a smaller opening from a previous installation, carefully enlarge it as necessary.
4. Mount the Heater to the TrailBlaze Plate
The TrailBlaze plate mounts between the heater and the ProMaster floor.
First, orient the heater correctly on the TrailBlaze plate.
On a typical gasoline heater:
The induction/intake side of the heater should face toward the lower side of the TrailBlaze plate.
The combustion chamber/hot-air side should face toward the taller side of the plate and toward the rear of the van.
This orientation allows the elevated TrailBlaze plate to angle the heater over the passenger-seat base, creating the clearance needed for the installation.
Attach the Heater
Install the heater onto the TrailBlaze plate using the mounting hardware supplied with your heater.
Most compatible heaters use four mounting studs and nuts. Heater mounting hardware is not included with the TrailBlaze plate.
Tighten the heater securely to the TrailBlaze plate according to the heater manufacturer's instructions.
5. Connect the Heater Components Before Installing the Plate
Before placing the TrailBlaze plate into the van, connect the heater-specific components that need to pass through the floor.
Depending on your heater, these may include:
Exhaust
Intake
Fuel line
Fuel-pump wiring or other heater-specific wiring
The exact fittings, hose sizes, clamps, wiring, and other components vary by heater. Follow your heater manufacturer's instructions for those connections.
Trim excess hose or wiring as appropriate, but leave enough length to make routing and final positioning easy.
Plan Your Routing Before Putting the Plate in Place
This is one of the most important parts of the installation.
Keep the fuel line away from the heater exhaust and exhaust heat.
The exhaust and fuel line should be routed toward opposite sides of the installation area wherever possible.
As a general layout:
Exhaust: route toward the exterior/passenger-side area of the van.
Fuel line: route toward the opposite side, away from the exhaust.
Intake: the intake can generally be routed toward the inside/driver-side area.
The larger 4.5–5" floor opening makes this separation much easier.
Do not allow the fuel line to rest against the exhaust or exhaust heat shield.
6. Pass the Heater Components Through the Floor
With the heater mounted to the TrailBlaze plate, carefully guide the heater's components through the floor opening.
Work the components into their intended directions as you lower the plate into position.
Having a second person underneath the van can make this step considerably easier. One person can guide the plate and components from above while the other helps position the exhaust, intake, and fuel line underneath.
The factory heat shielding may need to be moved slightly to provide access while routing the components. Take care not to damage it, and return it to its original position afterward.
Keep the Components Separated
As you position the plate, continue to check the routing underneath the van.
The fuel line should remain well away from the exhaust and exhaust heat.
Do not bundle the fuel line against the exhaust simply because doing so makes routing easier. The purpose of the larger opening is to give you enough flexibility to establish proper separation.
7. Position the TrailBlaze Plate
Once the heater and its components are routed through the floor, lower the TrailBlaze plate into its final position.
The mounting/sealing ring is already attached to the underside of the plate. Make sure the neoprene side of the ring is positioned against the floor and that the ring is sitting flat and properly nested.
Take your time positioning the plate.
The elevated design provides clearance for the heater over the seat base, but the exact positioning may require some adjustment depending on the heater being installed.
Before fastening anything permanently, verify:
The heater is sitting in the correct orientation.
The plate is straight and properly positioned.
The heater has adequate clearance from the seat base.
The exhaust has a clear route toward the exterior.
The fuel line is routed away from the exhaust and exhaust heat.
The intake has an appropriate route.
Nothing is pinched beneath the plate.
8. Route the Components Under the Van
Once the plate is positioned, continue routing the heater components underneath the van.
The exact routing will depend somewhat on the heater and the specific ProMaster configuration, but the same principles apply:
Exhaust
Route the exhaust toward the exterior of the van and away from areas where exhaust could enter the vehicle.
Keep the exhaust outlet away from the wheel well so dirt and water cannot easily enter the exhaust.
Also consider the location of the sliding door when choosing the final exhaust outlet position. The goal is to keep exhaust gases away from the passenger compartment and vehicle openings.
Follow the heater manufacturer's requirements for exhaust routing and termination.
Fuel Line
Route the fuel line away from the exhaust and exhaust heat.
Use the available space to keep the fuel line on the opposite side from the exhaust wherever possible.
Avoid routing the fuel line directly against heat shields or other hot components.
Intake
The intake is on the cooler side of the heater and can generally be routed toward the inside/driver-side area of the installation.
Keep the intake positioned away from the exhaust and ensure its final location is appropriate for your heater manufacturer's requirements.
9. Secure the Heater Components
Once you are satisfied with the routing, secure the heater's components using appropriate hardware or fasteners for your installation.
The current TrailBlaze mounting kit does not include zip ties or other routing hardware, so use suitable customer-supplied hardware as needed.
Make sure the fuel line cannot move into contact with the exhaust or another hot component.
10. Test the Heater Before Sealing the Plate
Before permanently sealing and anchoring the TrailBlaze plate, connect the heater according to the heater manufacturer's instructions and test the installation.
This includes:
Connecting the fuel system
Connecting the heater's electrical power
Verifying the heater operates correctly
Checking the routing underneath the van
Confirming the fuel line remains separated from the exhaust
Checking for any interference or unexpected movement
Electrical connections and the appropriate 12V power source will vary depending on the heater and vehicle setup, so follow the instructions supplied with your heater.
Testing before sealing the plate makes it much easier to correct an installation issue.
11. Seal the TrailBlaze Plate
Once everything has been tested and the plate is in its final position, seal the underside of the plate.
Leave enough slack in the heater components to lift the plate slightly without putting stress on the connections.
Apply sealant beneath the mounting/sealing ring and around the base of the plate to create a continuous seal between the plate and the vehicle floor.
The seal serves two important purposes:
It helps prevent exhaust fumes from entering the vehicle.
It helps keep water, weather, dirt, and insects from entering around the mounting plate.
Take your time and make sure the sealant makes good contact around the entire perimeter.
12. Secure the TrailBlaze Plate
With the plate sealed and positioned correctly, install the fasteners that secure the TrailBlaze plate to the vehicle.
There are two mounting points on each side of the plate.
Before tightening everything down, confirm that the plate is straight and that the sealing ring remains properly positioned.
Once secured, inspect the installation one more time underneath the van.
Pay particular attention to:
Fuel-line-to-exhaust separation
Exhaust clearance
Intake routing
Wiring
Heat shields
Any potential contact or rubbing
13. Reinstall the Passenger Seat
Once the TrailBlaze plate and heater installation are complete, reinstall the passenger seat and reconnect the vehicle's electrical connectors.
Reinstall the factory seat hardware and any covers or trim that were removed during the installation.
Follow the installation and operating instructions supplied with your specific heater for the remaining heater-specific steps.
Final Reminder
The TrailBlaze plate is designed to simplify and improve the physical mounting of a compatible gasoline heater in the ProMaster. The exact fuel connections, wiring, exhaust components, intake configuration, and operating procedures are specific to the heater you choose.
The most important TrailBlaze-specific routing consideration is to keep the fuel line away from the heater exhaust and exhaust heat. Use the space provided by the floor opening to route the exhaust and fuel line toward opposite sides of the van.